How to add an image to your WordPress site

Edit the page or post that you would like to add an image to. Then put your cursor in the location where you would like the image to appear and click on the Add Media button at the top.
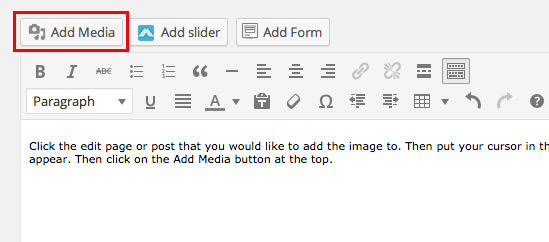
add-image-1


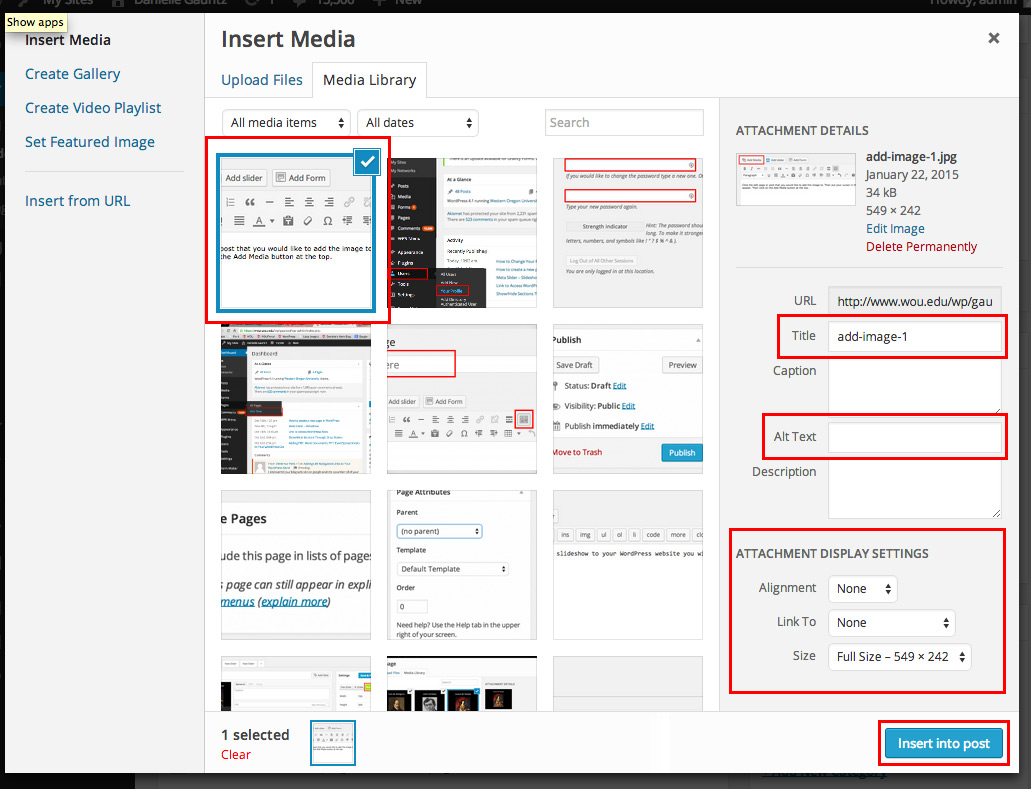
Then select the image you would like to insert.
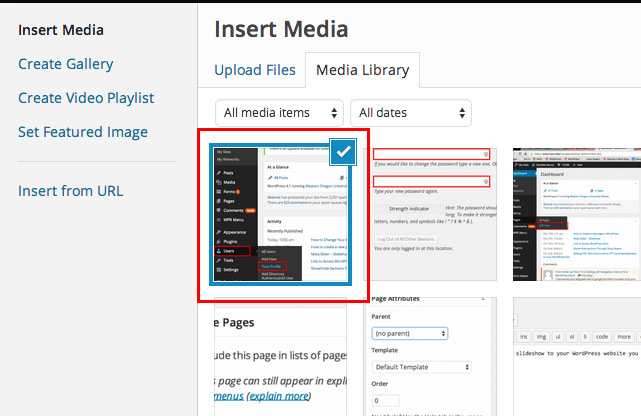
add-image-2


If you haven’t uploaded your image yet you can do so by selecting the tab at the top that says Upload Files. Then either drag and drop your files there or click on the Select Files button.
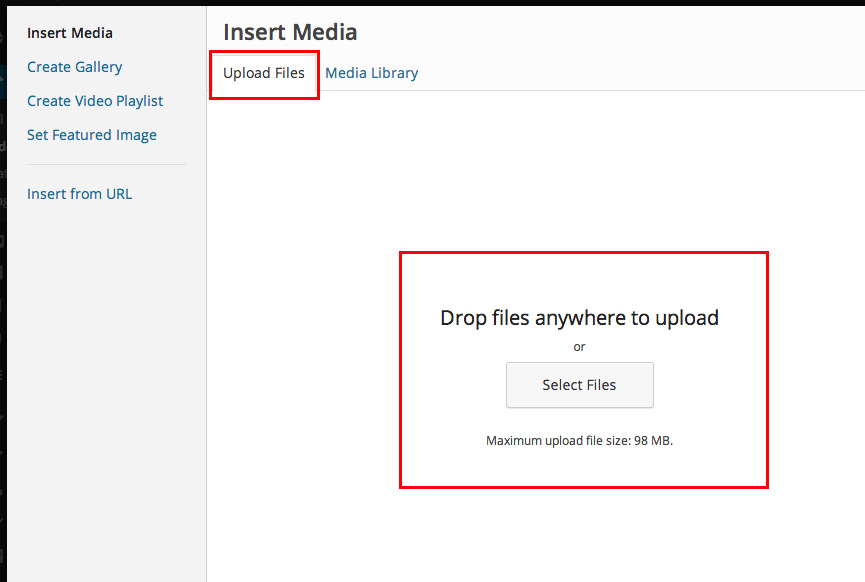
add-image-3


Then select the image you would like to insert and you can replace the Title (this is what appears when someone hovers over the image) You can add Alt Text (this helps with accessability for people who can not see). Then under the ATTACHMENT DISPLAY SETTINGS you can select the Alignment (this alows the picture to either float to the left/right of your image or centered). If you would like to Link To something from that dropdown select either a media file, attachment page, or a custom url. You can also select the size here as well. Once you are done with that click on the Insert into post button.add-image-4
 

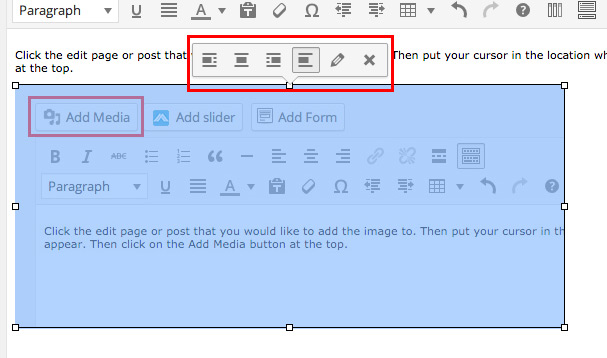
The image should now appear. You can edit the image by clicking on it and a dialog box will appear. From that menu you can change the alignment or click on the pencil to edit it. You can also click on the X if you would like to remove it. To move an image you can drag and drop it to where you would like it to go.
add-image-5

How to Change Your Password In WordPress

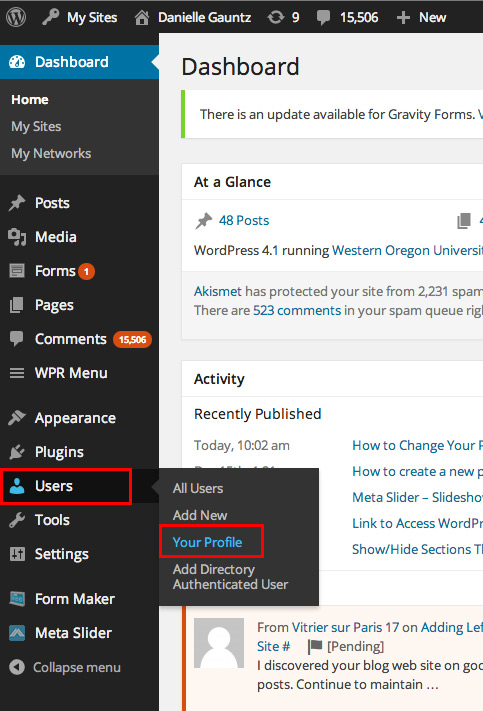
If you would like to change your password you will need to login to your WordPress site and then select Users from the left navigation. From there select Your Profile.

changePassword_1


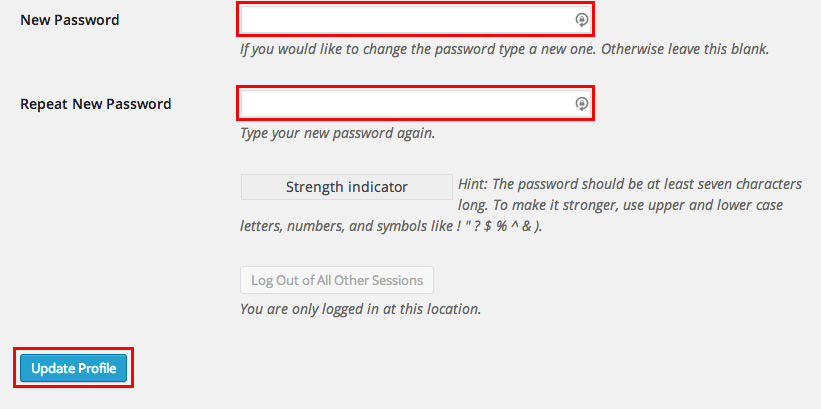
Then scroll to the bottom where it says New Password and Repeat New Password. Enter in your new password there and then click the Update Profile. Your password is now changed.

changePassword_2

How to create a new page in WordPress

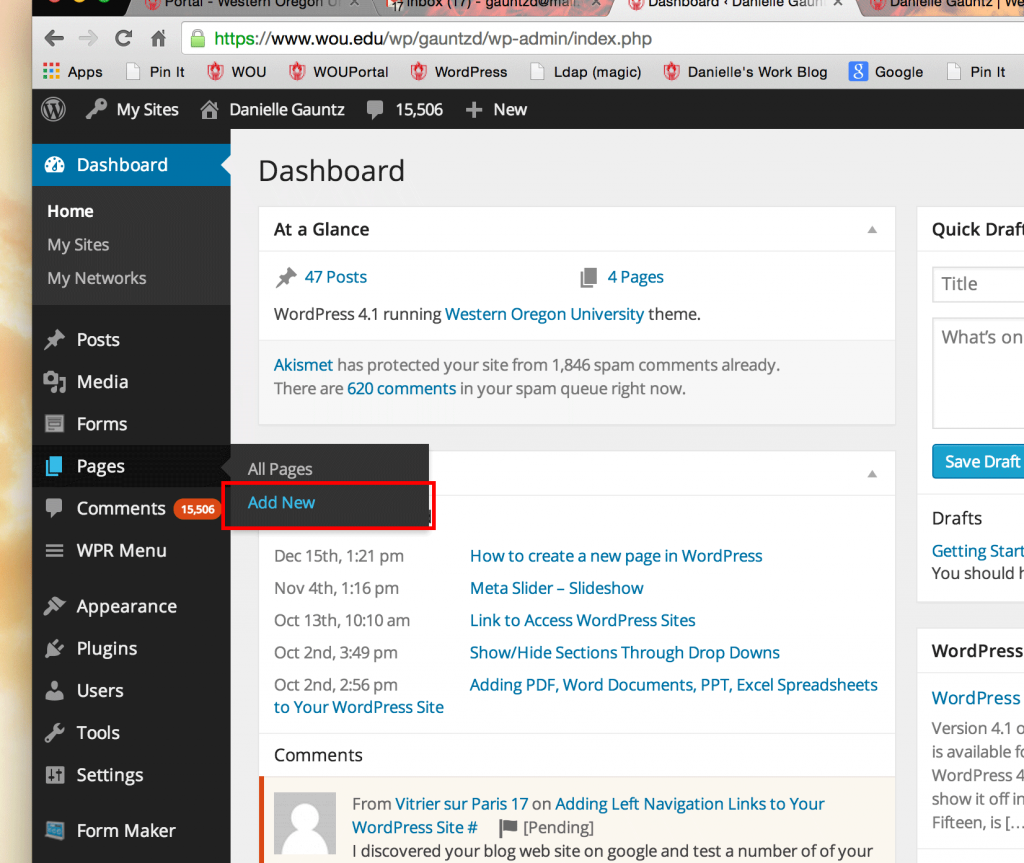
Once you have logged into WordPress and selected your site, on the left navigation hover over the link that says Pages and select Add New.

CreatingANewPage_02


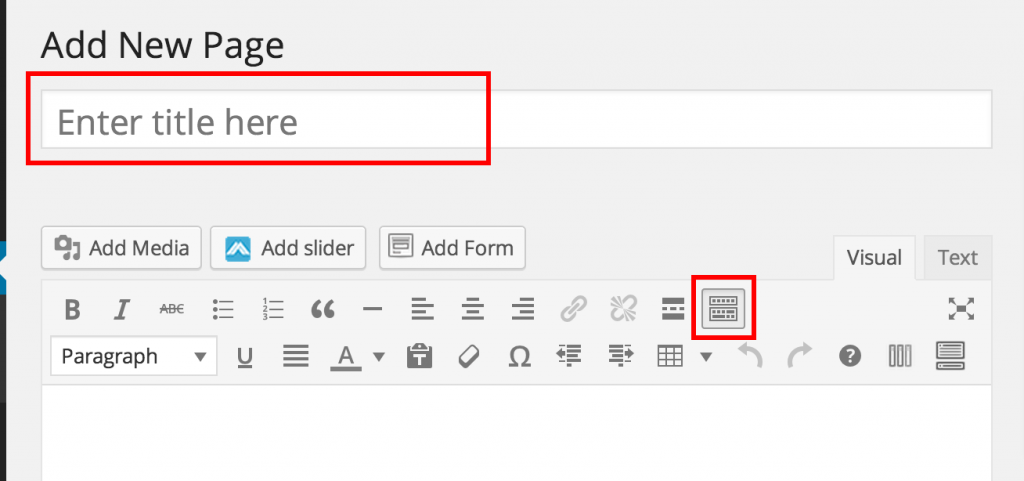
Click where it says Enter title here to add a title to you page.

CreatingANewPage_01


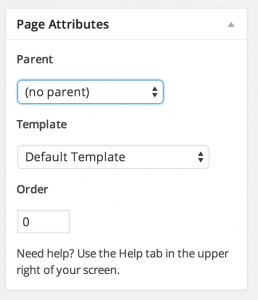
Under Page Attributes you can select where your page will show in the navigation and what template you would like. If you would like your page to appear under one of the dropdown menus at the top select the Parent dropdown and click on the one you would like it to show under. Under Order is where you will type the number of what order you would like it to appear (ex. if you would like it to be the second one down on the list from the dropdown you would type 1. It starts at 0 for the first one. This also applies for the order along the top of the navigation not just the dropdowns.) You can also select the Template here. If you would like it to have a left nav or just leave it on the Default Template which will give you the page with no left navigation.

CreatingANewPage_03

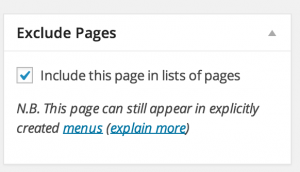
If you would like the page not to show in the navigation at all then uncheck the box in the Exclude Pages menu that says Include this page in lists and pages.

CreatingANewPage_04

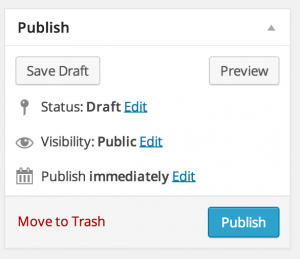
When you are done and ready to Publish you can click the Publish button in the top right Publish menu. You also have other choices here. You can just save the draft for later and or you can publish it but turn the Visibility to Private. You can also change the Publish time to a date in the future if you don’t want it to go live until a certain time.

CreatingANewPage_05

Meta Slider – Slideshow

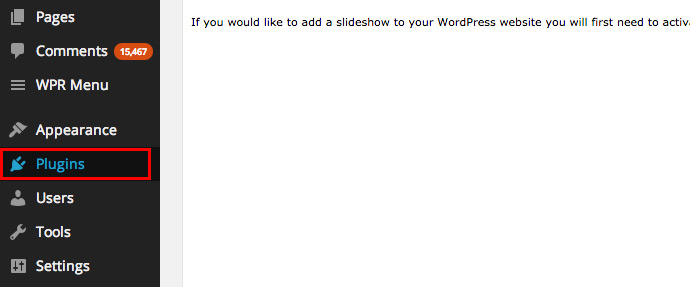
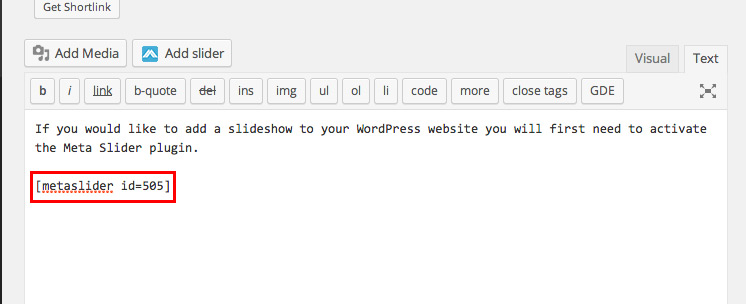
If you would like to add a slideshow to your WordPress website you will first need to activate the Meta Slider plugin. Click on the Plugins link on the left.
metaslider_01

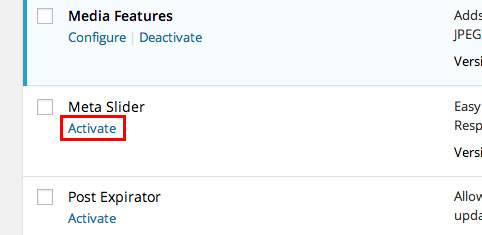
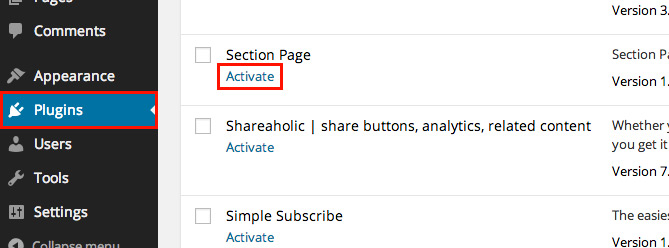
Then click Activate under the Meta Slider plugin.
metaslider_02

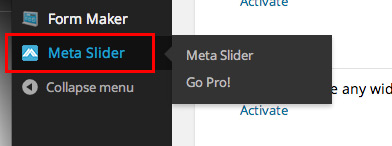
Click on the Meta Slider link from the left navigation.
metaslider_03

Click on the + sign next to Create your first slideshow
metaslider_04

To name your slideshow click on the New Slider text and rename it.
metaslider_05

Then click on the Add Slide button.
metaslider_06

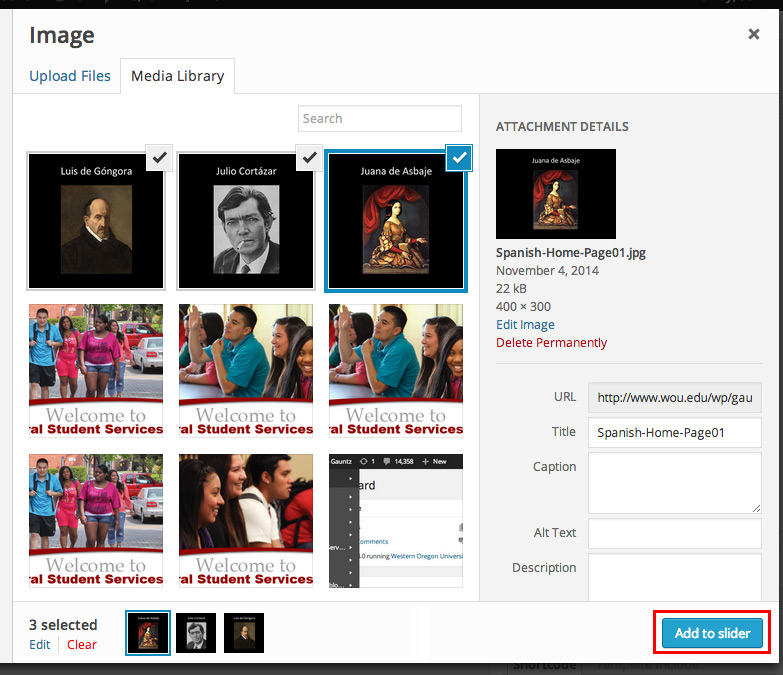
Now you can either Upload Files or select any of the images from your Media Library and click the Add to slider button.
metaslider_07

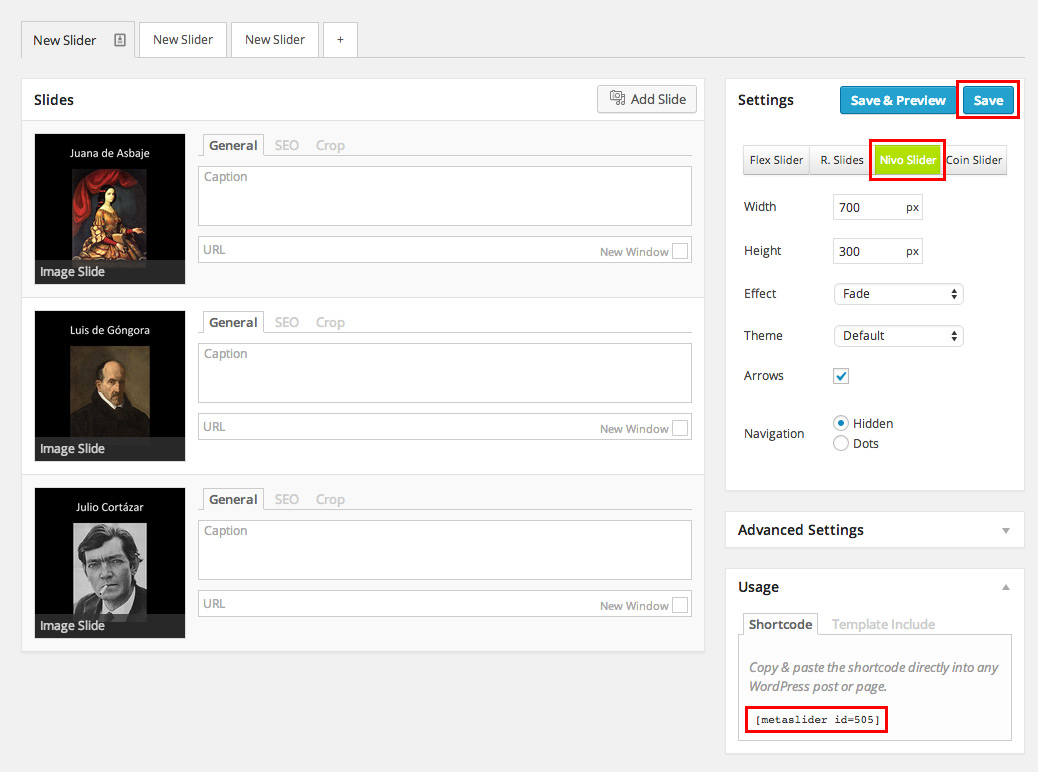
Now you can add Captions and URLs to any of the images. You will want to select Nivo Slider from the Settings menu on the right and specify the size you would like it to appear. You can also go through the settings and customize them to what you would like, then click the Save button. Under the Usage menu it gives you a Shortcode that you can copy.metaslider_08

Paste that Shortcode on the page where you would like the slideshow to appear.
metaslider_09

Example of a slideshow using Meta Slider

Show/Hide Sections Through Drop Downs

This will allow viewers to click on either an arrow down or a title to view sections of your page that are hidden.

Go to Plugins on the left and activate the “Section Page” plugin.

activate_section_page

Once activated you will have an icon that appears in your kitchen sink.insert_dropdown_block

Put your curser where you would like to insert a new section and click on the “Insert dropdown block” icon. You can then change the TITLE HERE to whatever you would like the dropdown name to be and then enter your content in-between the

put_text_here

Example 1

Content for Example 1 here. Content for Example 1 here. Content for Example 1 here. Content for Example 1 here. Content for Example 1 here. Content for Example 1 here. Content for Example 1 here.

Example 2

Content for Example 2 here. Content for Example 2 here. Content for Example 2 here.

Example 3

Content for Example 3 here. Content for Example 3 here. Content for Example 3 here. Content for Example 3 here. Content for Example 3 here.

Adding PDF, Word Documents, PPT, Excel Spreadsheets to Your WordPress Site

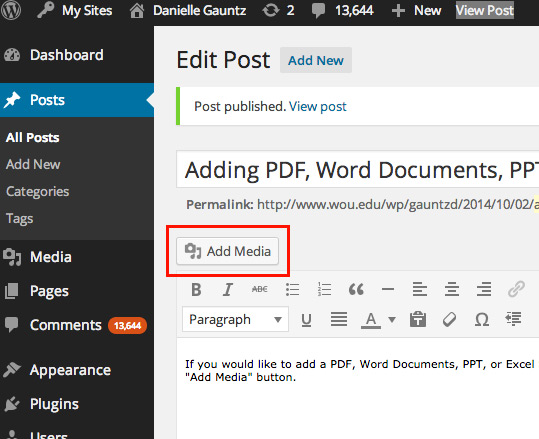
If you would like to add a PDF, Word Document, PPT, or Excel Spreadsheet to your WordPress site using the Add Media feature all you need to do is click on the “Add Media” button.

add_media_btn


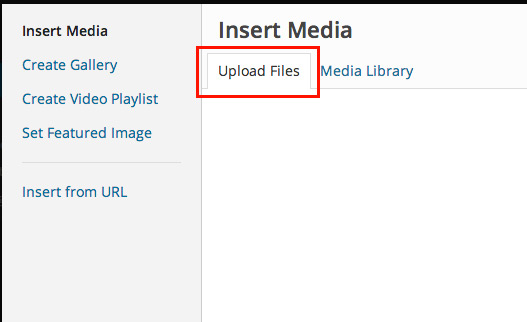
Then click on the “Upload Files” tab and drag and drop your files into the window.

upload_files


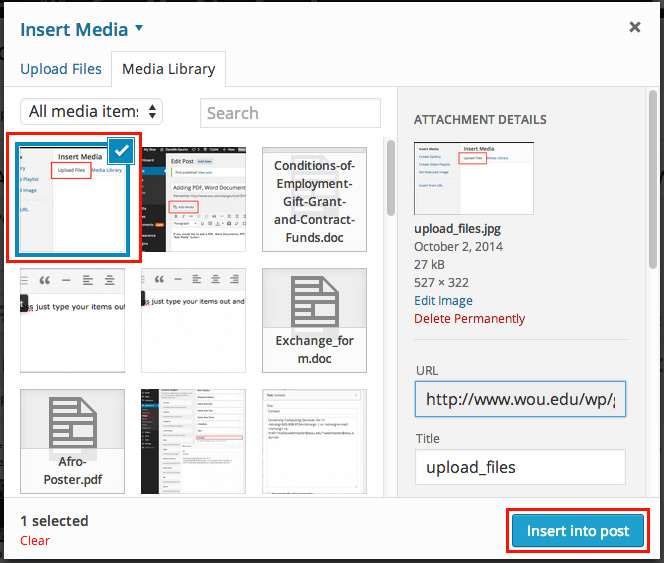
From there you can insert them into your page or post.

insert_media


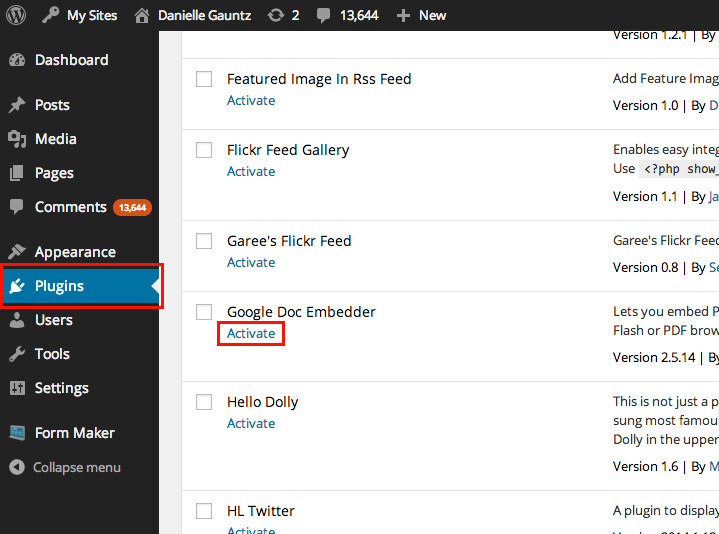
If you would like to display the files on the page and not as links, you can activate the “Google Doc Embedder” plugin by going to the Plugins tab on the left and clicking on the “Activate” link under the Google Doc Embedder plugin. Once activated any time you select a file through the “Add Media” button, it will show in the viewer.

activate_google_doc_viewer


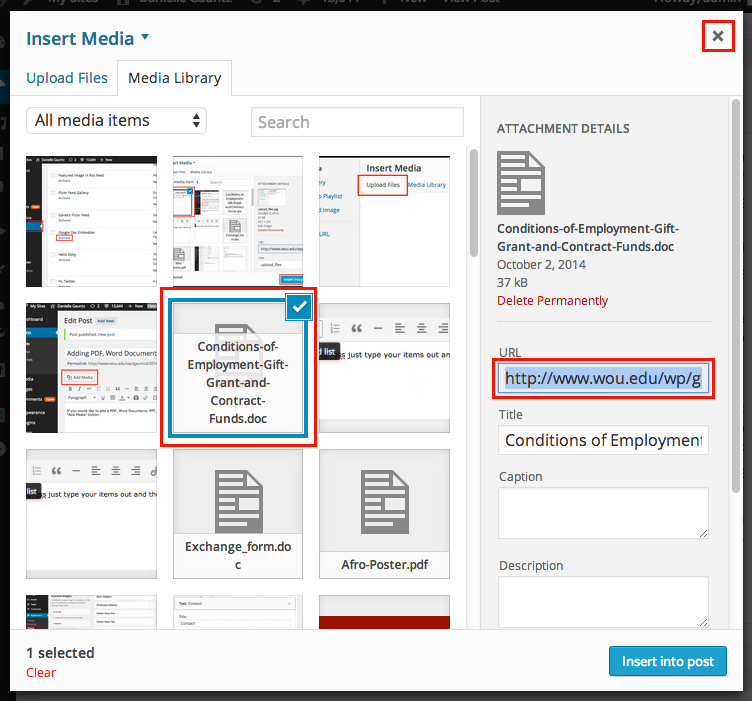
Once this plugin is installed if you would like to just have a link to a certain files and not show them in the viewer, select the “Add Media” button and select the file you would like to link to and copy the URL. and then click the “X” in the top right hand corner.

copy_url


Select the words that you would like to link to the file and click on the “insert/edit link” button.

insert_link


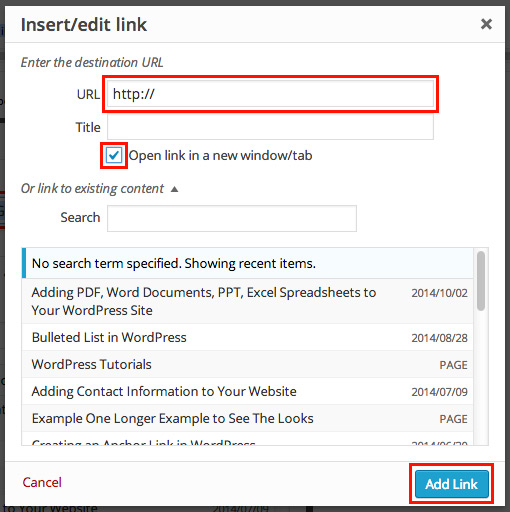
Then paste the URL into the “URL” box, check the “Open link in a new window/tab” box and click “Add Link”

add_link

Bulleted List in WordPress

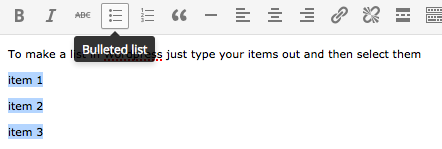
To make a bulleted list in WordPress just type your list items with a return in-between them. Select them and click on the icon Bulleted List icon. Your items will show up with bullets next to them now. Hit publish and you are done.

  • item 1
  • item 2
  • item 3

list

Adding Contact Information to Your Website

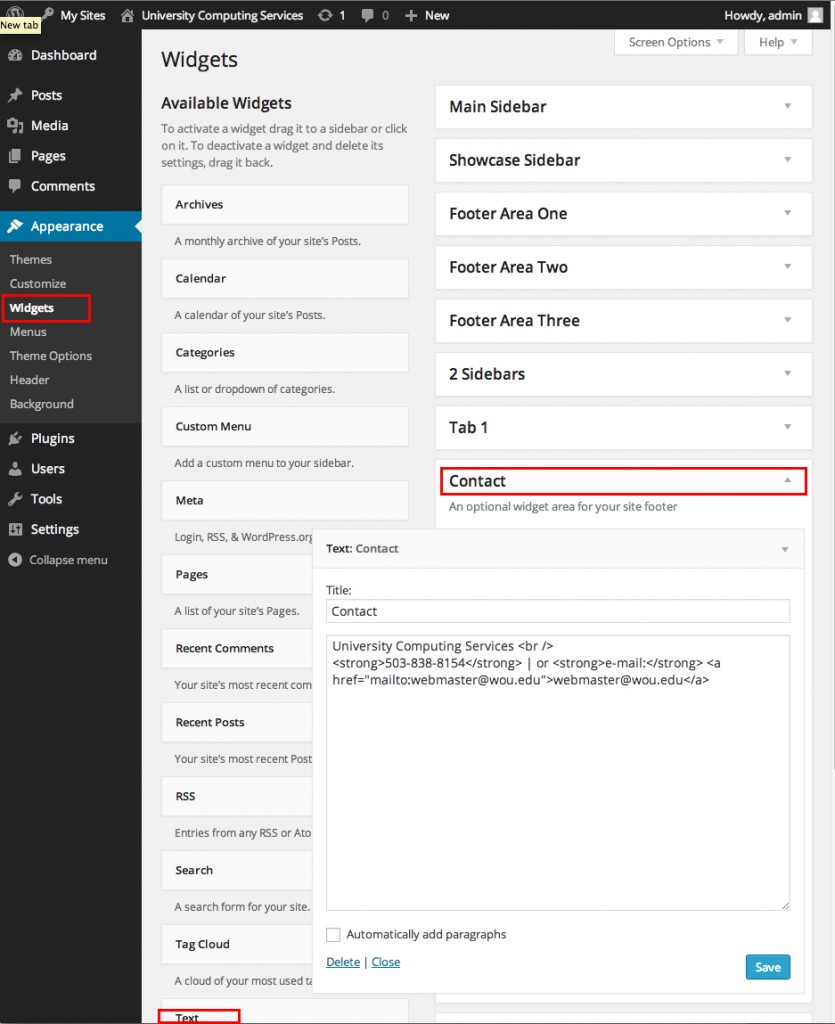
In WordPress go to the Appearance tab on the left and select Widgets. Expand the Contact sidebar and then drag a Text widget into it. For the Title put Contact. Then copy and paste the text below and change out the red copy to your contact information and then click save.

Contact Name Here<br />
<strong>503-838-XXXX</strong> | or <strong>e-mail:</strong> <a href=”mailto:email_address_here@wou.edu“>email_address_here@wou.edu</a>


Contact Screenshot

Creating an Anchor Link in WordPress

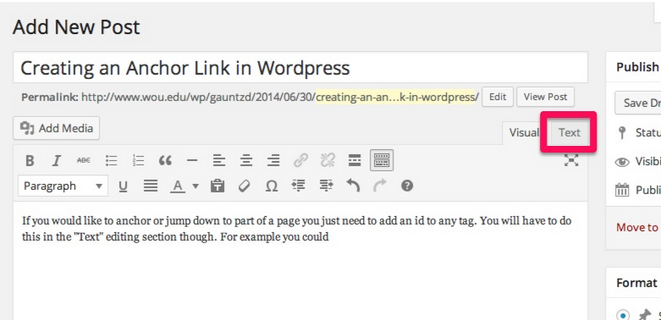
If you would like to anchor or jump down to part of a page you will need to add an id to any tag. This can only be done in the “Text” editing section though.

Text tabOnce that has been selected you will want to navigate down to the place on the page where you want to anchor or jump to. Select a tag and add an id to it, for example <h2 id=”WordToAnchorTo”></h2>

Then go back to the “Visual” editor and select the word that you would like to link to the anchor. Then click on the link icon.

link icon


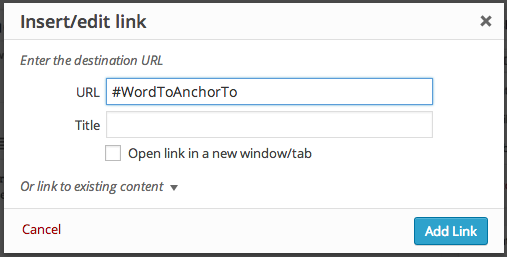
In the box that pops up you want to put a # and then the exact id you gave your tag. So to match with my example above you would put #WordToAnchorTo.

link box example