I attended the 4th Annual Higher Education Flipped Learning Conference June12-14, 2019. My presentation was entitled “Empowering Student Learning via Digital Media Creation”. The main theme of my presentation was the use of student -generated content in the flipped classroom. Types of projects include video production, digital textbook authoring, podcasting, making infographics, comics and virtual field trips. I discussed the elements involved in the project and the tools that are needed to make them. Examples of student projects were shown. I have prepared a resources and tools handout, which I am linking to this post.
Have you ever needed to quickly scan a document to either save it or send it to someone else? One way to scan a document is to use a multi-function printer to scan the document to a pdf and either save it to your computer or email it to a recipient. Alternatively, you can get a scanning app for your phone which allows the phone’s camera to do the scanning. Many apps are available that can turn your phone (or tablet) into a portable scanner. Some are free, some are not, and the apps vary in quality. Did you know that you already have an app that can do this if you have an iPhone, and it comes with your phone? The app is called Notes.
Many people use Notes to scan documents by opening the app, telling it to create a new note and then from the menu choosing “Scan Document” from the list of options. This process works well. However, you do not need to do all those steps to do capture a scan. Instead of tapping the Notes icon, long press it. From the menu that appears choose “Scan Document”. The scan saves automatically as a new note. You can export the scan to use it in a variety of ways via the share sheet.
I am always interested in finding new instruments to use in student generated content projects. Padlet is a device-neutral application that allows the displaying of information on any topic. It can be used like a traditional bulletin board or for such activities as blogging, publishing podcasts or videos, bookmarking, making brochures and posters or as the base of a discussion board. You can use Padlet as a publishing tool or just as a private notes app. This is a great application because it allows the collaboration of multiple people adding content to a padlet. Another nice touch is that work is autosaved as it is generated so work is not lost when students forget to save as can happen in some wikis.
You can choose who sees your padlets from the general public to just members of a class or even making your padlet completely private for your eyes only. In a collaboration application, you determine the level of access by assigning individuals read only, read-write, moderator or administrative access. Padlets can be collaborated on by a single class, multiple classes within the same institution or by classes at multiple institutions. How fun would it be to have your class interact with experts via a padlet mechanism? The uses for this app are endless. Here is a link to an article on using Padlet for blogging in the classroom.
Some of the things you can include in a padlet are documents, images, hyperlinks, audio and video files. Files can be uploaded from a computer or mobile devices, and content from the web such as a YouTube video can be embedded into your padlet. In turn, you can embed padlets into webpages, blogs or an LMS; export them as pdf files, images or a host of other files; or distribute them the old-fashioned way by printing them.
Padlet is available for use in a browser, and there are apps available for iOS, Android and Kindle devices. There is a basic free padlet account available which allows you to have three operating padlets, however, uploaded files must not be larger than 10 MB. The basic plan is not a trial, but rather, an account that does not expire. Padlet Pro is $8.25/month (or $99/year) with unlimited padlets and upload available for files up to 250 MB in size. On the free plan, you can delete a padlet you no longer need to start a new one to keep within the three padlet limit. For a collaborative project, you can generate one padlet to be used by everyone in the class. If you refer others who then sign up for a padlet account, you will be given an additional padlet for every three people who join from your referral. If you are interested in signing up for a free account, you can help me out by using my referral link.
Have you ever wanted to make a quick little video to show someone how to do something on an iPhone or iPad? Or perhaps write out a quick note that can be emailed to a student showing how to solve a problem? The former can be done on any iOS device, while the latter uses an iPad Pro and Apple pencil. With this combo, you can record the screen as you draw on it and email the short video to the student. This is all possible just using features available in the iOS 11 and 12 operating systems.You can choose to make a silent screencast, one that only records system noises or one that allows you to record your voice while making the screencast. All you have to do to begin making screen recordings is to activate the screen recorder in the control panel of your device.
To make the screen recorder available, go into SETTINGS and open the CONTROL PANEL entry. Open CUSTOMIZE CONTROLS and choose SCREEN RECORDING. This will put the screen recording button on the control panel so you can activate screen recording with two gestures, the swipe that opens the control panel followed by a click of the record icon. That’s all there is to it!This will allow you to make silent screencasts or ones with system sounds if your device’s ringer is on. Adding voice to the recording is easy. Instead of tapping the record icon, you need to 3D touch or long press it. This will bring up the microphone icon. Tapping on the icon will turn the microphone on (tapping also turns it off if it is already on). After engaging the microphone, tap “start recording”. This will start a short count down. When the count down reaches one, screen and voice recording will begin. Your recording will be saved to the device’s Photos album. From the album, you can share the recording in a variety of ways including by email.
There are lots of hidden features in iOS. Do you have one that you have discovered that is useful?
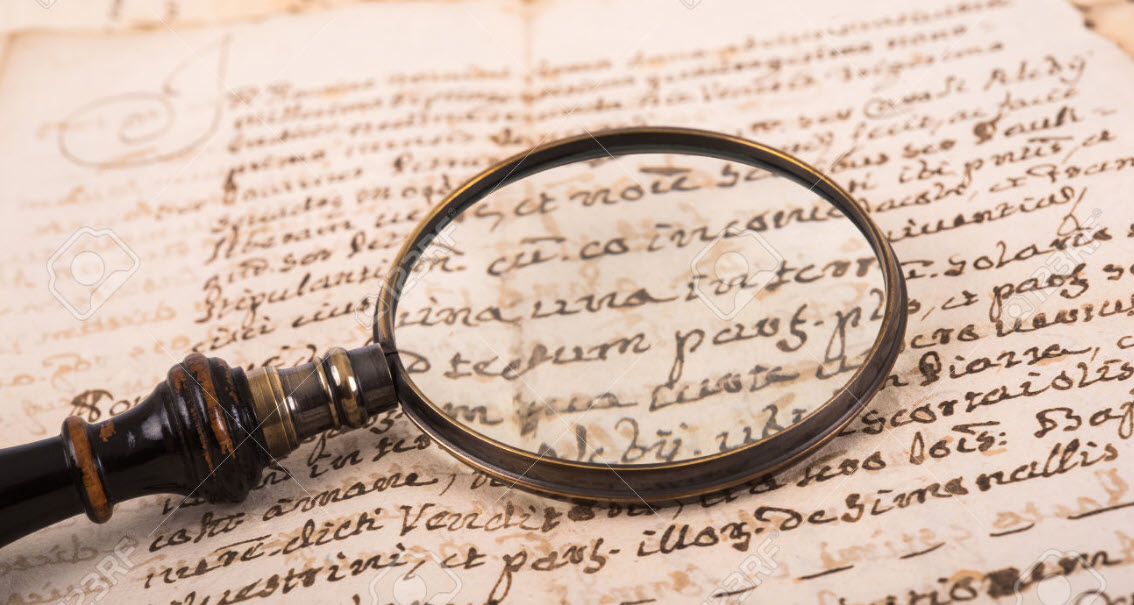
When you are out and about, have you ever wished you had a magnifying glass available to read small print, remove a splinter, etc? One of my hobbies is genealogical research which often requires reading documents written with poor handwriting or the unfamiliar penmanship styles of previous time periods.These documents are more easily decipherable if you can magnify them. Good news! If you have an i-Phone, you have a potential magnifier in your pocket! You do not need an app to use your phone as a magnifier since this is already available in iOS as an accessibility feature. All you need to do is activate it in settings, and the iPhone will use the camera to make it work as a magnifying glass. Unfortunately, I do not know if a similar feature is available on Android devices.
To activate the magnifier, open SETTINGS, choose the GENERAL option.and then open ACCESSIBILITY. Click on MAGNIIFIER and turn on this feature. When you want to activate the magnifier on a pre-iPhone X model, click the HOME button three times. On the iPhone X, activation occurs on three clicks of the SIDE button.
Have you found other generally useful features in the accessibility menu? If so, I would love to learn about them.
I have used a student-generated content project in my CH 361 Energy, Resources and the Environment class for quite a number of years. In this class, we do not use a commercial textbook, but rather, students generate the e-textbook used. This is done using a wiki platform. The way the project works is that each class edits what has been previously written, updates the data and adds new sections. Since the course is taught in alternating years, this keeps the textbook relatively current on a topic that is extremely fluid. Although a wiki application works quite well for my purposes, it is a little limiting in the respect that the “book” is only available for reading online.
I am always looking for ways to improve the projects I use and found an app called Book Creator which allows you to add text, images, audio, and video to generate e-books. Unlike applications such as i-Books Author, it is easy enough for anyone to use. It can be used by teachers to generate classroom resources, by students for creative projects or by anyone who wants to create an e-book. Here are some of the types of things this app could be used for:
instruction manuals
digital portfolios
lab notebooks
travel journals
textbooks
picture books
group creative writing books
the modern scrapbook
a recipe cookbook
I am sure there are a plethora of other applications for this app. Although Book Creator was originally designed as an iPad app, it is now available as a web app as well. When you are done creating your masterpiece, you can publish it for general distribution as an e-pub, an i-Book or a pdf document. e-Pub is a universal format that can be read on any platform while i-Books are Apple specific. The pdf is universal, but if the book has audio or video clips, they will not be incorporated into the final published form and would need to be made available to your audience through the web or other distribution mechanism.
Book Creator allows a teacher to generate a library that contains up to 40 books for free. There are paid accounts that allow multiple libraries and larger numbers of books, but for many classroom applications, the free account is sufficient. You do not have to be an actual teacher to sign up for an account and generate e-books. Students can have individual accounts, but I haven’t explored that feature. I am going to have students use this app in their capstone laboratory experience course next year for generating electronic laboratory notebooks.
Have you ever wanted to add an image, a signature, delete or add a page to a pdf file? You can do that with software such as Adobe Acrobat DC ($12.99/month); PDF Pen (mac $74.99) and PDF Expert (mac $59.99), all great software if you do a lot of pdf editing. However, if you only need to occasionally modify a pdf document, there is a free open source solution available to you.
LibreOffice 6 is an open source competitor to the Microsoft Office Suite. It contains the traditional features of a word processor, spreadsheet and presentation module (Word, Excel and PowerPoint functions) and an Access-like database. In addition it has DRAW for creating vector graphics and other artwork and MATH for editing mathematical formulas. LibreOffice is available in versions for Windows, MacOS and some forms of Linux. Best of all, it is FREE! You can learn more about LibreOffice 6 and download it here.
The DRAW module allows you to create a pdf from scratch or edit an existing document. Once you have opened the document in DRAW, you can add, edit or delete text; add or delete pages; add images; add or change tables; add a digital signature; sign with a watermark; or set encryption/permissions, to name a few things you can do. When you are done with your changes, you just export your masterpiece as pdf.
If your documents contain complex formatting, LibreOffice is probably not going to be your best solution, and you will want to use one of the more fully-featured tools. However, if you only need to revise pdfs occasionally and have fairly basic editing needs, check out LibreOffice as free is a very good price! Learn more about editing pdfs using LibreOffice here.
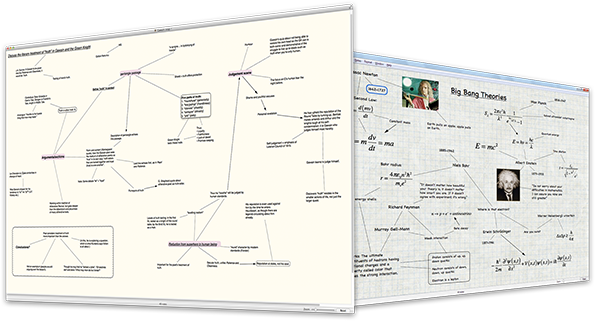
Most students when working on a research paper, seminar style presentation or other major project begin by writing an outline. The problem with using outlining during the initial planning stages is that it locks you into a linear flow pattern which can be like putting on blinders. A lesser number of students may use a mind mapping strategy which is more freeform although it does encourage starting from a central point. Enter Scapple, a software application that provides a totally freeform way to get ideas flowing. The Scapple canvas acts like a piece of paper on which you can write random ideas anywhere you wish without the necessity of making any connections during the creative thinking process. As development proceeds, lines can be added to connect ideas as shown in the image below from the Scapple website. The application allows the student to easily experiment with different idea connection patterns. Once a desired flow is obtained, the student can convert it to an outline if he/she wishes. For the last few years, my chemistry students have successfully used Scapple in the development of their senior seminars.
Scapple is an inexpensive application available for both macOS and Windows from Literature and Latte. A regular license for either platform is $14.99 while an educational license is $12. Literature and Latte has a very lenient policy allowing a single license to be used on multiple computers as long as they are owned by the licensee.
If you think you have a use for such a tool, you should download it an try it out. Literature and Latte allows you to download a fully functional version of the application and use it for 30 days of actual use (not just a period of calendar days) which is more than enough time for you and/or your students to use it for organizing a project.
Remember the days when you spent hours in the library looking through dusty books taking notes on 3 x 5 cards? If you were a chemistry student, you used the dreaded volumes of Chemical Abstracts which required knowledge of how to use a series of different paper indexes and whose tomes took up entire sections of floors of libraries. Although today’s students are used to “googling” everything, most just type sentences or a few keywords into the search box to find information. Google has many search tools that allow the researcher to conduct efficient searches that can target results from reputable and scholarly sources.
I have put together a web resource for use by my upper division students (although it could be used by students at any level as well as non students) that introduces them to a variety of tools allowing them to target specific types of information. The site is freely available for anyone to use for themselves or their students. You might even find some tools with which you were unfamiliar!
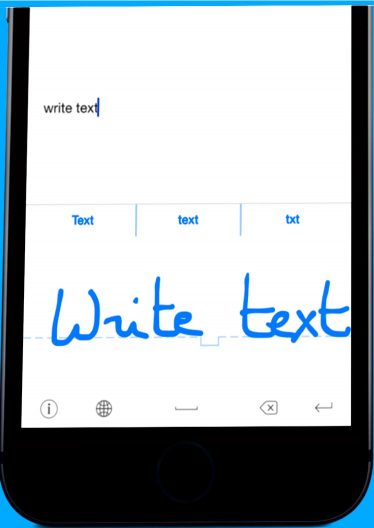
If you like writing rather than typing to take notes, then MyScript Stylus may be for you. It is a keyboard that you load onto your mobile device allowing you to input information by writing with your finger, stylus or Apple pencil. This application converts your handwriting into digital text as you write. To use the application, you activate it as a keyboard on your device. It can be used for inputting text into email, your calendar, your word processor, etc…virtually anything that uses text. The application is available for both IOS and Android devices, not just devices such as iPad Pros. It is particularly helpful for writing text messages and emails on mobile phones rather than trying to type using the on-screen keyboard. The app is free and available from the Apple App store and the Google Play store.

 Creation”. The main theme of my presentation was the use of student -generated content in the flipped classroom. Types of projects include video production, digital textbook authoring, podcasting, making infographics, comics and virtual field trips. I discussed the elements involved in the project and the tools that are needed to make them. Examples of student projects were shown. I have prepared a resources and tools handout, which I am linking to this post.